Mastering Blender: A Comprehensive Guide to Using Blender
Blender, the free and open-source 3D creation suite, is a powerful tool used by artists, animators, and game developers worldwide. Understanding the instructions of using Blender is crucial for anyone looking to dive into the world of 3D modeling, animation, and rendering. This comprehensive guide will walk you through the fundamental aspects of Blender, from installation to basic modeling techniques, ensuring you have a solid foundation to build upon. Whether you’re a complete beginner or have some experience with other 3D software, this article provides clear and concise instructions of using Blender to help you unlock its full potential. This guide covers everything from navigating the interface to creating your first 3D model. We will explore the user interface, basic modeling tools, materials, lighting, and rendering. By the end of this guide, you’ll have a good understanding of the instructions of using Blender.
Getting Started: Installation and Setup
Before you can start creating amazing 3D art, you need to install Blender. The process is straightforward and well-documented. Blender is compatible with Windows, macOS, and Linux.
Downloading Blender
- Visit the official Blender website: blender.org/download/
- Choose the appropriate version for your operating system.
- Download the installer.
Installing Blender
Follow these steps to install Blender on your computer:
- Windows: Double-click the downloaded .exe file and follow the on-screen instructions. You can choose to install Blender to a specific directory or use the default location.
- macOS: Open the downloaded .dmg file and drag the Blender icon to your Applications folder.
- Linux: The installation process varies depending on your distribution. Typically, you’ll need to extract the downloaded archive to a directory of your choice and then run the Blender executable.
Launching Blender
Once installed, launch Blender from your applications menu or desktop shortcut. The first time you launch Blender, you may be presented with a splash screen. Here, you can configure some basic settings, such as language and keyboard shortcuts. Understanding these initial settings is part of the instructions of using Blender efficiently.
Understanding the Blender Interface
The Blender interface can seem daunting at first, but it’s logically organized into different areas, each serving a specific purpose. Knowing the layout is a key aspect of the instructions of using Blender.
The Header
Located at the top of the Blender window, the header contains menus for file operations (File), adding objects (Add), rendering (Render), and window configuration (Window). It also includes tools for selecting different workspaces, such as Modeling, Sculpting, UV Editing, and Animation.
The 3D Viewport
The 3D Viewport is the main area where you’ll interact with your 3D scene. It displays your models, lights, and cameras. You can navigate the viewport using the following controls:
- Rotate: Middle mouse button (MMB) + drag
- Pan: Shift + MMB + drag
- Zoom: Mouse wheel or Ctrl + MMB + drag
Understanding these navigation controls is fundamental to the instructions of using Blender.
The Outliner
The Outliner displays a hierarchical list of all objects in your scene. It’s useful for selecting, organizing, and managing your objects. You can rename objects, hide them, or parent them to other objects in the Outliner.
The Properties Editor
The Properties Editor displays the properties of the currently selected object. It’s organized into tabs, each representing a different aspect of the object, such as its location, rotation, scale, materials, and modifiers. The properties editor is where you’ll fine-tune the details of your models and scenes. Learning to navigate this area is crucial to instructions of using Blender.
The Timeline
The Timeline is used for animation. It displays a timeline of frames and allows you to set keyframes for object properties, creating animations. Even if you aren’t interested in animation, understanding the timeline can be useful for visualizing the sequence of your work.
Basic Modeling Techniques
Modeling is the process of creating 3D objects. Blender offers a wide range of modeling tools, allowing you to create anything from simple shapes to complex characters and environments. Mastering these techniques is a vital part of understanding the instructions of using Blender.
Adding Objects
To add an object to your scene, press Shift + A or use the Add menu in the header. You can choose from a variety of primitive shapes, such as cubes, spheres, cylinders, and planes. Once you’ve added an object, you can manipulate it using the transform tools.
Transform Tools
The transform tools allow you to move, rotate, and scale objects. You can access these tools using the following shortcuts:
- Move: G
- Rotate: R
- Scale: S
After pressing the shortcut key, you can drag the mouse to transform the object. You can also constrain the transformation to a specific axis by pressing X, Y, or Z after pressing the shortcut key. For example, pressing G then X will move the object along the X-axis. These are fundamental aspects of the instructions of using Blender.
Edit Mode
Edit Mode allows you to modify the individual vertices, edges, and faces of a mesh object. To enter Edit Mode, select the object and press Tab. In Edit Mode, you’ll have access to a variety of tools for manipulating the mesh, such as extrude, bevel, and loop cut. Understanding the edit mode is essential for the instructions of using Blender.
Modifiers
Modifiers are non-destructive operations that can be applied to objects. They allow you to add complexity and detail to your models without permanently altering the underlying geometry. Some common modifiers include:
- Subdivision Surface: Smooths the object by subdividing the faces.
- Bevel: Creates rounded edges on the object.
- Array: Creates multiple copies of the object in a specified pattern.
Modifiers are a powerful tool for streamlining your workflow and creating complex models. Using modifiers is an advanced aspect of the instructions of using Blender.
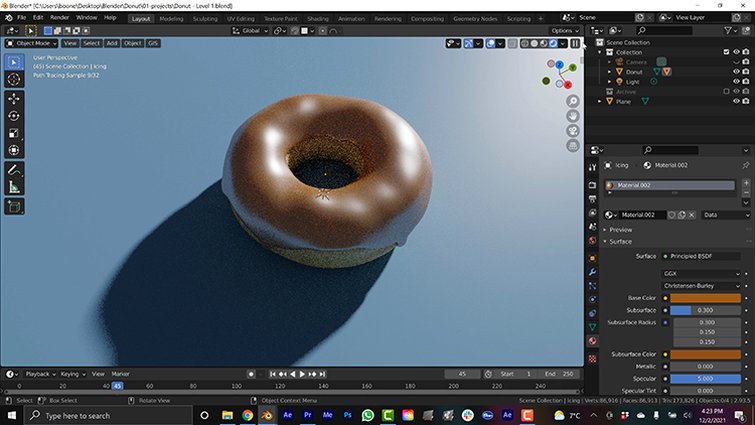
Materials and Textures
Materials define the surface properties of an object, such as its color, reflectivity, and roughness. Textures are images or procedural patterns that can be applied to materials to add detail and visual interest. Learning to apply materials and textures is a key part of the instructions of using Blender.
Creating Materials
To create a material, select an object and go to the Material tab in the Properties Editor. Click the New button to create a new material. You can then adjust the material’s properties, such as its base color, metallic value, and roughness. The material editor is where you configure how the object looks.
Adding Textures
To add a texture to a material, you’ll need to use the Shader Editor. The Shader Editor is a node-based editor that allows you to create complex material setups. To open the Shader Editor, select the Shading workspace from the header. You can add a texture node by pressing Shift + A and searching for Image Texture. Connect the texture node to the appropriate input of the material node. Textures add realism to your models.
Lighting and Rendering
Lighting and rendering are the final steps in the 3D creation process. Lighting determines how your scene is illuminated, while rendering generates the final image. Mastering lighting and rendering are important parts of the instructions of using Blender.
Adding Lights
To add a light to your scene, press Shift + A and select Light. You can choose from a variety of light types, such as point lights, sun lights, and spot lights. Adjust the light’s properties, such as its color, intensity, and size, to achieve the desired effect.
Rendering
To render your scene, go to the Render tab in the Properties Editor. Choose your render engine (Eevee or Cycles) and adjust the render settings, such as the resolution and sample count. Press F12 to render the image. Eevee is a real-time render engine that is faster but less accurate than Cycles. Cycles is a path-tracing render engine that produces more realistic results but takes longer to render. Understanding the difference is part of the instructions of using Blender.
Conclusion
This guide has provided a comprehensive overview of the instructions of using Blender, covering everything from installation to basic modeling, materials, lighting, and rendering. By following these instructions, you’ll have a solid foundation to build upon and can start creating your own amazing 3D art. Remember to practice regularly and explore the vast resources available online to further your skills. Blender is a powerful tool, and with dedication and practice, you can unlock its full potential. Keep exploring and learning! This guide provides a starting point for understanding the instructions of using Blender, but the possibilities are endless.
[See also: Blender Animation Tutorial]
[See also: Advanced Modeling Techniques in Blender]
