Pull Out Kitchen Faucet Leaking? Troubleshoot and Fix Common Issues
Discovering a pull out kitchen faucet leaking can be frustrating. Not only does it waste water and potentially increase your water bill, but it can also cause damage to your countertops and cabinets. This comprehensive guide will walk you through the common causes of leaks in pull out kitchen faucets and provide step-by-step instructions for troubleshooting and fixing them. We’ll cover everything from identifying the source of the leak to replacing worn-out parts.
Understanding the Anatomy of a Pull Out Kitchen Faucet
Before diving into troubleshooting, it’s essential to understand the components of a pull out kitchen faucet. These faucets are more complex than standard faucets, featuring a retractable hose, a spray head, and various connection points that are prone to leaks. Key components include:
- The Faucet Body: The main structure that houses the valve cartridge and connects to the water supply lines.
- The Valve Cartridge: Controls the water flow and temperature.
- The Pull Out Hose: A flexible hose that extends from the faucet body to the spray head.
- The Spray Head: The nozzle at the end of the pull out hose, used for directing the water flow.
- The Quick Connect Fittings: Connect the hose to the faucet body and the spray head.
- The Weight: Attached to the hose under the sink to help retract the spray head smoothly.
Identifying the Source of the Leak
The first step in fixing a pull out kitchen faucet leaking is to pinpoint the exact location of the leak. Common areas where leaks occur include:
- Around the Base of the Faucet: Indicates a problem with the faucet’s mounting or the O-rings sealing it to the sink.
- From the Handle: Suggests a faulty valve cartridge.
- Where the Hose Connects to the Faucet Body: Points to a loose or damaged quick connect fitting or a worn O-ring.
- From the Spray Head: Could be due to a cracked spray head or a loose connection.
- Along the Hose: Indicates a puncture or tear in the hose itself.
- Under the Sink (at Hose Connections): Usually a sign of loose connections or worn out O-rings.
Carefully inspect each of these areas while the faucet is running to identify the precise source of the pull out kitchen faucet leaking. Dry each area with a towel and watch closely to see where the water is originating.
Troubleshooting and Fixing Common Leaks
Leak at the Base of the Faucet
A pull out kitchen faucet leaking at the base often means the faucet isn’t properly sealed to the sink. Here’s how to address this:
- Tighten the Mounting Nuts: Underneath the sink, locate the nuts that secure the faucet to the countertop. Use a wrench to gently tighten these nuts. Be careful not to overtighten, as this could damage the sink or faucet.
- Replace the O-Rings: If tightening the nuts doesn’t solve the problem, the O-rings may be worn out. Turn off the water supply to the faucet. Disconnect the water lines and then remove the faucet from the sink. Inspect the O-rings at the base of the faucet. If they appear cracked or worn, replace them with new O-rings of the same size.
- Apply Plumber’s Putty: Before reinstalling the faucet, apply a bead of plumber’s putty around the base of the faucet to create a watertight seal.
Leak from the Handle
A pull out kitchen faucet leaking from the handle typically indicates a faulty valve cartridge. Here’s how to fix it:
- Turn Off the Water Supply: Locate the shut-off valves under the sink and turn them off.
- Remove the Handle: Depending on the faucet model, you may need to loosen a set screw or remove a decorative cap to access the screw that holds the handle in place.
- Remove the Cartridge Retaining Clip: Once the handle is removed, you’ll see a retaining clip holding the cartridge in place. Use pliers to remove this clip.
- Pull Out the Old Cartridge: Gently pull the old cartridge straight out of the faucet body.
- Install the New Cartridge: Insert the new cartridge into the faucet body, ensuring it’s properly aligned. Replace the retaining clip and reattach the handle.
Leak at the Hose Connection
A pull out kitchen faucet leaking where the hose connects to the faucet body or spray head is often due to a loose connection or a damaged O-ring. Follow these steps:
- Tighten the Connection: Use a wrench to gently tighten the quick connect fitting. Be careful not to overtighten.
- Replace the O-Ring: If tightening doesn’t stop the leak, the O-ring inside the fitting may be worn out. Disconnect the hose and inspect the O-ring. Replace it with a new O-ring of the same size.
- Check the Quick Connect Fitting: Examine the fitting for cracks or damage. If the fitting is damaged, replace it with a new one.
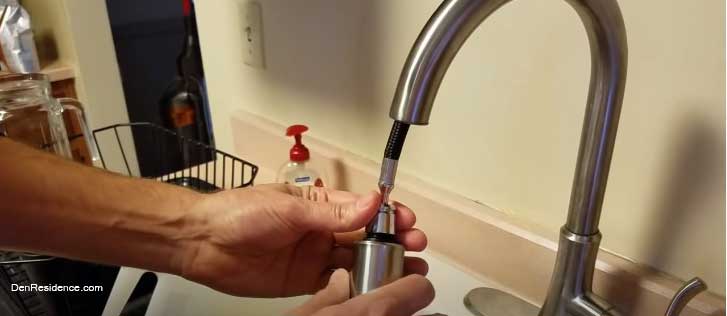
Leak from the Spray Head
If your pull out kitchen faucet is leaking from the spray head, the issue could be a cracked spray head or a loose connection. Here’s how to address it:
- Tighten the Connection: Ensure the spray head is securely attached to the hose. Tighten the connection by hand.
- Clean the Spray Head: Mineral buildup can sometimes cause leaks. Soak the spray head in a solution of vinegar and water to remove any buildup.
- Replace the Spray Head: If the spray head is cracked or damaged, replace it with a new one.
Leak Along the Hose
A pull out kitchen faucet leaking along the hose indicates a puncture or tear in the hose itself. Unfortunately, there’s no easy fix for this. The entire hose needs to be replaced.
- Purchase a Replacement Hose: Buy a new hose that’s compatible with your faucet model.
- Disconnect the Old Hose: Disconnect the old hose from the faucet body and the spray head.
- Install the New Hose: Connect the new hose to the faucet body and the spray head, ensuring the connections are secure.
Preventative Maintenance Tips
To prevent future leaks and extend the life of your pull out kitchen faucet, consider these maintenance tips:
- Regularly Inspect Connections: Check the connections for leaks every few months and tighten them as needed.
- Replace O-Rings Periodically: O-rings can dry out and crack over time. Replace them every few years, or sooner if you notice any leaks.
- Clean the Spray Head: Periodically clean the spray head to remove mineral buildup.
- Avoid Harsh Chemicals: Use mild soap and water to clean the faucet. Avoid using harsh chemicals that can damage the finish and seals.
- Properly Support the Hose: Ensure the weight under the sink is properly positioned to allow smooth retraction and prevent unnecessary stress on the hose.
When to Call a Professional
While many pull out kitchen faucet leaking issues can be resolved with DIY repairs, there are times when it’s best to call a professional plumber. If you’re uncomfortable working with plumbing, if you’ve tried the troubleshooting steps and the leak persists, or if you suspect a more serious plumbing problem, it’s wise to seek professional help. A plumber can accurately diagnose the issue and perform the necessary repairs to ensure your faucet is functioning properly and safely.
Addressing a pull out kitchen faucet leaking promptly can save you money on water bills and prevent potential water damage to your home. By understanding the common causes of leaks and following these troubleshooting steps, you can often fix the problem yourself. Remember to always turn off the water supply before starting any repairs and to use caution when working with plumbing components.
[See also: How to Replace a Kitchen Faucet Cartridge]
[See also: Best Kitchen Faucet Brands for Durability]
