Troubleshooting a Leak in Your Single Arm Kitchen Sink: A Comprehensive Guide
Discovering a leak in your single arm kitchen sink can be frustrating. Not only does it waste water, potentially increasing your utility bills, but it can also lead to water damage and mold growth if left unaddressed. This comprehensive guide provides a step-by-step approach to identifying the source of the leak in your single arm kitchen sink and implementing effective solutions. Whether you’re a seasoned DIY enthusiast or a novice homeowner, this article will equip you with the knowledge and confidence to tackle this common household problem.
Understanding Single Arm Kitchen Sinks
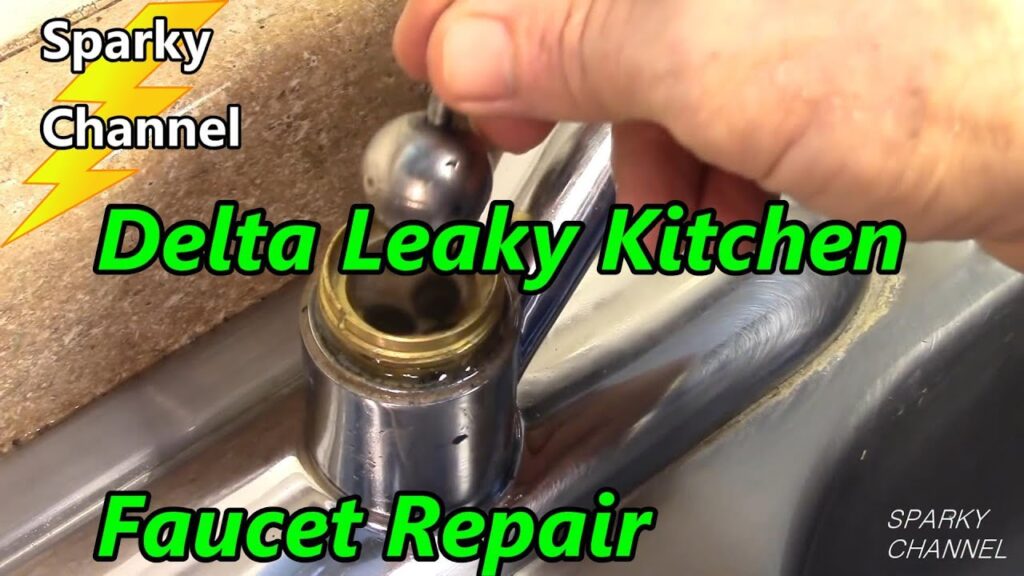
Single arm kitchen sinks, also known as single-handle faucets, are popular for their ease of use and sleek design. They control both water temperature and flow with a single lever, making them incredibly convenient. However, their internal mechanisms can be complex, which sometimes leads to leaks in single arm kitchen sinks. Before diving into troubleshooting, it’s essential to understand the basic components of a single arm faucet:
- Handle: Controls water flow and temperature.
- Cartridge: The core component that mixes hot and cold water.
- O-rings and Seals: Rubber or silicone rings that prevent water from escaping.
- Spout: The part of the faucet where water exits.
- Supply Lines: Flexible hoses that connect the faucet to the hot and cold water supply.
- Aerator: A screen at the end of the spout that mixes air with water to reduce splashing.
Identifying the Source of the Leak
The first step in resolving a leak in your single arm kitchen sink is pinpointing its exact location. This will determine the necessary repairs. Here are some common areas where leaks occur:
Around the Base of the Faucet
A leak at the base often indicates a problem with the O-rings or the faucet’s connection to the sink. Water may seep out when the faucet is in use. Check the mounting nuts beneath the sink to ensure they are tight. If the nuts are secure, the O-rings may need replacement.
From the Spout
A dripping spout, even when the faucet is turned off, typically suggests a faulty cartridge. Over time, the cartridge can wear out, allowing water to bypass the shut-off mechanism. Replacing the cartridge is usually the best solution for a leak in your single arm kitchen sink originating from the spout.
Under the Sink (Supply Lines and Connections)
Examine the supply lines and connections beneath the sink for any signs of moisture. Leaks here could be due to loose connections, corroded pipes, or damaged supply lines. Tighten the connections with a wrench, but be careful not to overtighten, which could cause further damage. If the supply lines are old or damaged, replace them.
From the Handle
Water leaking around the handle often points to worn-out O-rings or a loose cartridge. Replacing the O-rings or cartridge is usually the remedy. Make sure to shut off the water supply before attempting any repairs.
Tools and Materials You’ll Need
Before starting any repairs on your leaky single arm kitchen sink, gather the necessary tools and materials. This will ensure a smooth and efficient repair process.
- Adjustable Wrench: For tightening and loosening nuts and connections.
- Screwdrivers (Phillips and Flathead): To remove screws holding the faucet components together.
- Pliers: For gripping and manipulating small parts.
- Basin Wrench: A specialized wrench for loosening and tightening faucet mounting nuts in tight spaces.
- New Cartridge, O-rings, or Supply Lines: Depending on the source of the leak.
- Plumber’s Putty or Silicone Sealant: To create a watertight seal around the faucet base.
- Clean Rags or Towels: To wipe up spills and keep the work area clean.
- Bucket: To catch any remaining water in the pipes.
Step-by-Step Repair Guide
Once you’ve identified the source of the leak in your single arm kitchen sink and gathered your tools, follow these steps to repair the faucet:
Step 1: Shut Off the Water Supply
Locate the shut-off valves under the sink for both the hot and cold water supply lines. Turn them clockwise to shut off the water. If you don’t have individual shut-off valves, you’ll need to turn off the main water supply to your house.
Step 2: Relieve Water Pressure
Turn on the faucet to relieve any remaining water pressure in the lines. Allow the water to drain completely.
Step 3: Disassemble the Faucet
Carefully disassemble the faucet, following the manufacturer’s instructions if available. Typically, this involves removing the handle, spout, and any decorative caps. Take note of the order in which you remove the parts, as this will help you reassemble the faucet correctly. If you’re dealing with a persistent leak in your single arm kitchen sink, taking pictures as you disassemble it can be extremely helpful.
Step 4: Inspect and Replace Worn Parts
Inspect the O-rings, cartridge, and other components for any signs of wear, damage, or corrosion. Replace any worn or damaged parts with new ones. Make sure to use the correct replacement parts for your specific faucet model. A leak in your single arm kitchen sink is often caused by a simple worn-out O-ring.
Step 5: Reassemble the Faucet
Reassemble the faucet in the reverse order of disassembly. Make sure all parts are properly aligned and securely tightened. Apply plumber’s putty or silicone sealant around the base of the faucet to create a watertight seal.
Step 6: Turn On the Water Supply and Test for Leaks
Slowly turn on the water supply valves. Check for any leaks around the faucet base, spout, handle, and supply line connections. If you find any leaks, tighten the connections or re-seat the O-rings or cartridge. If the leak in your single arm kitchen sink persists, you may need to disassemble the faucet again and re-inspect the parts.
Preventing Future Leaks
Regular maintenance can help prevent future leaks in single arm kitchen sinks. Here are some tips:
- Inspect Regularly: Periodically check your faucet for any signs of leaks or drips.
- Replace Worn Parts: Replace O-rings and cartridges as needed to prevent leaks.
- Avoid Over-Tightening: When tightening connections, avoid over-tightening, which can damage the parts.
- Use a Water Softener: Hard water can cause mineral buildup and corrosion, leading to leaks. Consider using a water softener to protect your plumbing.
When to Call a Professional
While many leaks in single arm kitchen sinks can be repaired DIY, some situations require the expertise of a professional plumber. Consider calling a plumber if:
- You are uncomfortable performing the repairs yourself.
- You are unable to identify the source of the leak.
- The leak is severe or causing water damage.
- You encounter difficulty disassembling or reassembling the faucet.
A plumber has the knowledge, skills, and tools to diagnose and repair complex plumbing issues, ensuring a long-lasting solution. Addressing a leak in your single arm kitchen sink promptly can prevent costly water damage and save you money on your water bill.
Dealing with a leak in your single arm kitchen sink can be a manageable task with the right knowledge and approach. By understanding the components of your faucet, identifying the source of the leak, and following the step-by-step repair guide, you can effectively resolve the issue and prevent future problems. Remember to prioritize safety and don’t hesitate to seek professional help when needed. This guide should help you tackle that annoying leak in your single arm kitchen sink. Remember, a small drip can lead to bigger problems, so act fast!
[See also: How to Replace a Kitchen Faucet Cartridge]
[See also: Common Kitchen Plumbing Problems and Solutions]
